By Danielle Harvey
With Halloween approaching, decorating for the holiday is in full swing. Some choose to break out the old tried and true jack-o-lanterns and spider webs, while others live for the thrill of creating something new each year. If the latter category is more exciting, then check out these three bloggers and their easy DIY decorations.
DIY Del Ray
Katie Briscoe and Leslie Duss are the duo behind, DIY Del Ray. This Northern Virginia Blog is all about their daily projects, interior inspirations, organizing tips and more. They’re sharing their Halloween décor project on how to make Paper Mache Spiders. For more of their DIY activities, visit their blog here.
Paper Mache Spiders
What You’ll Need: Newspaper, Masking Tape, Glue & Water, Paint, Gemstones and Pipe Cleaners
Steps:
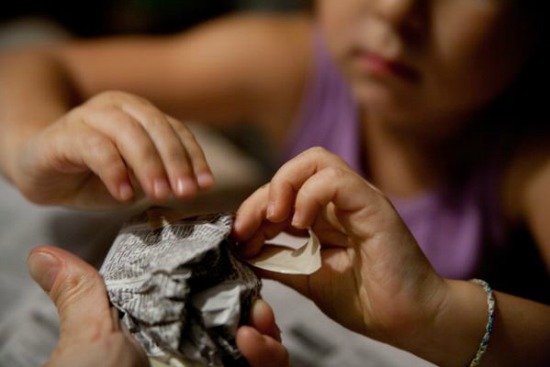
1. Crumple up newspaper to make the main body shape.
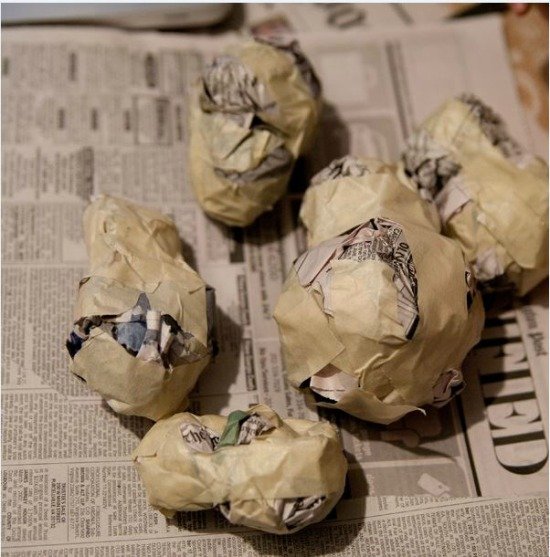
2. Use masking tape to secure the sides.
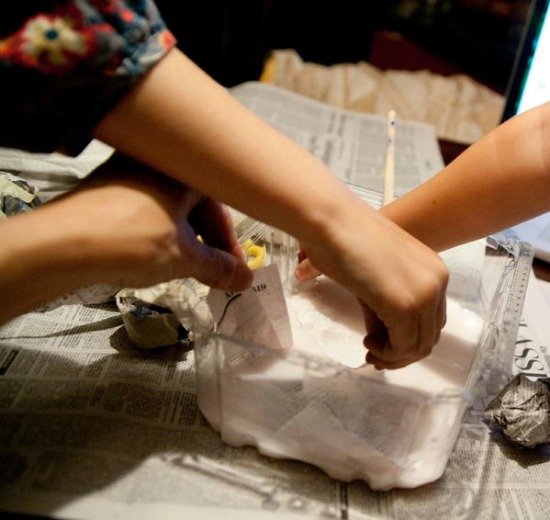
3. Mix glue with water to make the paper mache paste.
4. Layer strips of newspaper, soaked in the paste, around the bodies.
5. Let the bodies dry overnight on a rack.
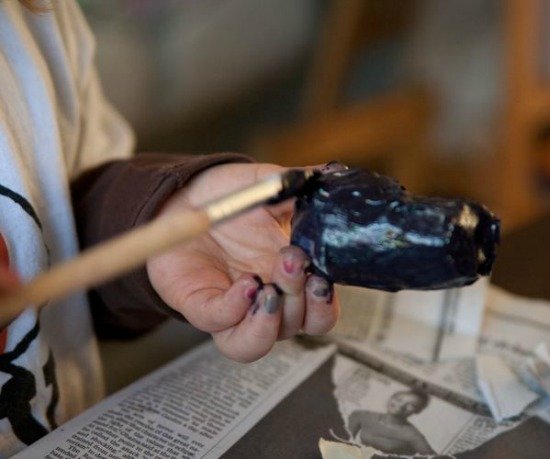
6. Paint the bodies black or purple-black.
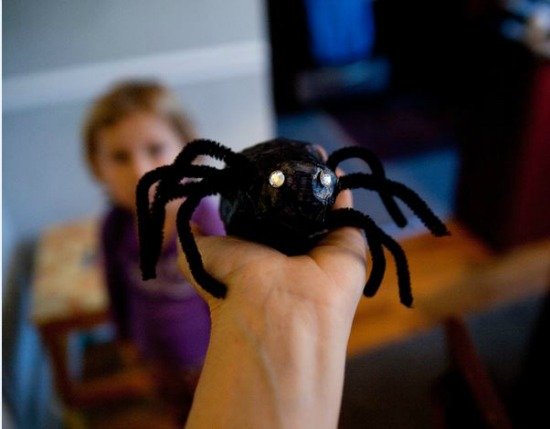
7. Affix gemstones for eyes and poke pipe cleaners in the sides for legs.
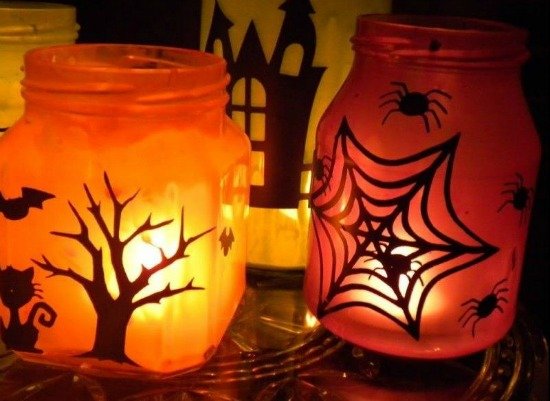
Amanda Niederhauser is the woman behind Jedi Craft Girl. She shares her passion for crafting, sewing, DIY and more. Amanda is sharing her Halloween Décor project on Painted Halloween Jar Luminaries. To view other projects or crafts, visit her blog here.
Painted Halloween Jar Luminaries
What You’ll Need: Glass Jars – any size or style, White School Glue, Craft Paint (Halloween Colors), Sponge Brushes, Vinyl Stickers or vinyl die cuts
Steps:
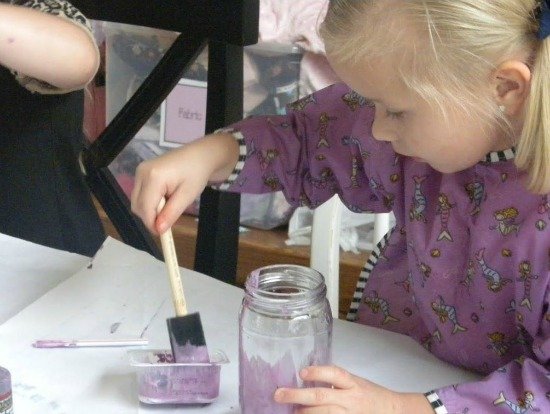
1. Prep your jars by removing any labels and washing and drying them.
2. In a disposable container (sour cream, yogurt, etc.) mix half a cup of white glue and a few tablespoons of paint. The more glue the more transparent the jars are. You are really trying to tint the glue.
3. Take a sponge brush and dip in the paint/glue mixture and coat the inside of the jar. If you want a more finished look, then coat the inside of the jars evenly. Allow to dry. Try using colors like orange, green, purple, and aqua.

4. Once the jars are dried you can apply the decorative stickers.
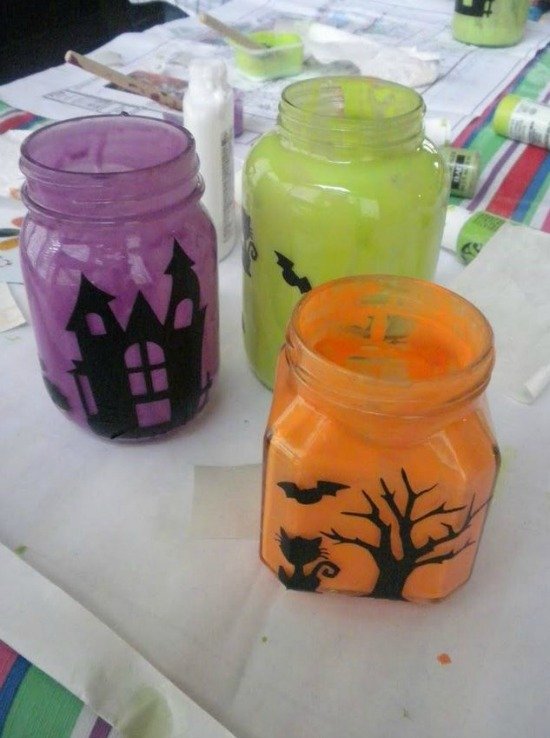
5. Add tea lights and you are ready to go.
Aniko Levai writes the blog Place of My Taste. She moved to the U.S. 14 years ago and shares her recipes, photography, DIY projects and more on her blog. Her Halloween Décor project is all about Painted Pumpkins. It’s a quick and simple way to make them stand out. For more of her DIY projects visit her blog here.
Decorative Pumpkins
What you’ll need: Pumpkins, White Paint, Sharpie, Fabric and Twine to embellish, Mod Podge (exterior)
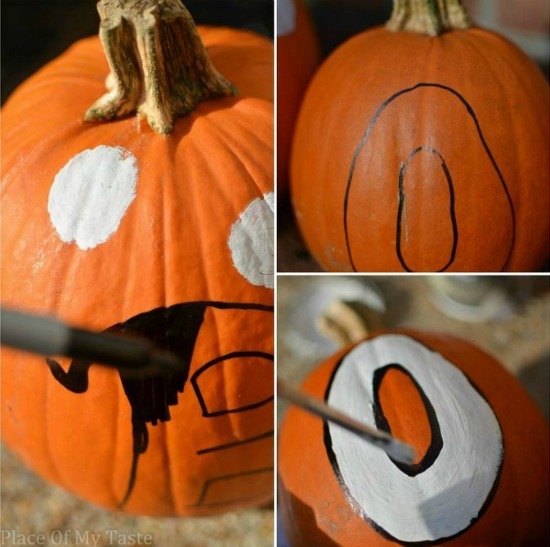
Steps:
1. Start by painting polka dots on the biggest pumpkin.
2. Use a small paint brush and off white paint for the dots.
3. Use the sharpie to draw out the word “BOO.”
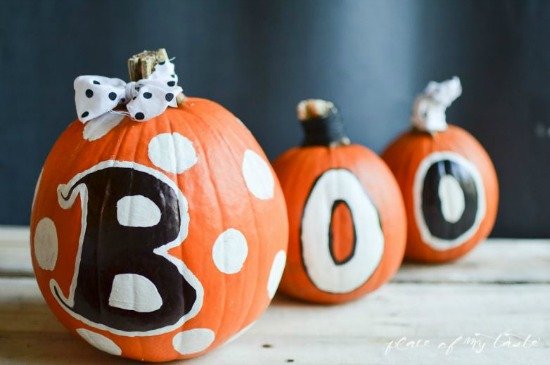
4. Then use mod podge to seal the paint.
5. Then embellish the pumpkins with a pretty fabric.